A resin driveway is an increasingly popular choice for homeowners looking to enhance their property’s curb appeal while maintaining durability and low maintenance. Resin driveway are attractive, versatile, and long-lasting, offering a smooth finish with a range of design options. Installing a resin driveway may seem daunting at first, but with the right preparation and method, it is a manageable DIY project. This guide will provide a detailed, step-by-step process to help you achieve a professional finish.
Understanding Resin Driveways
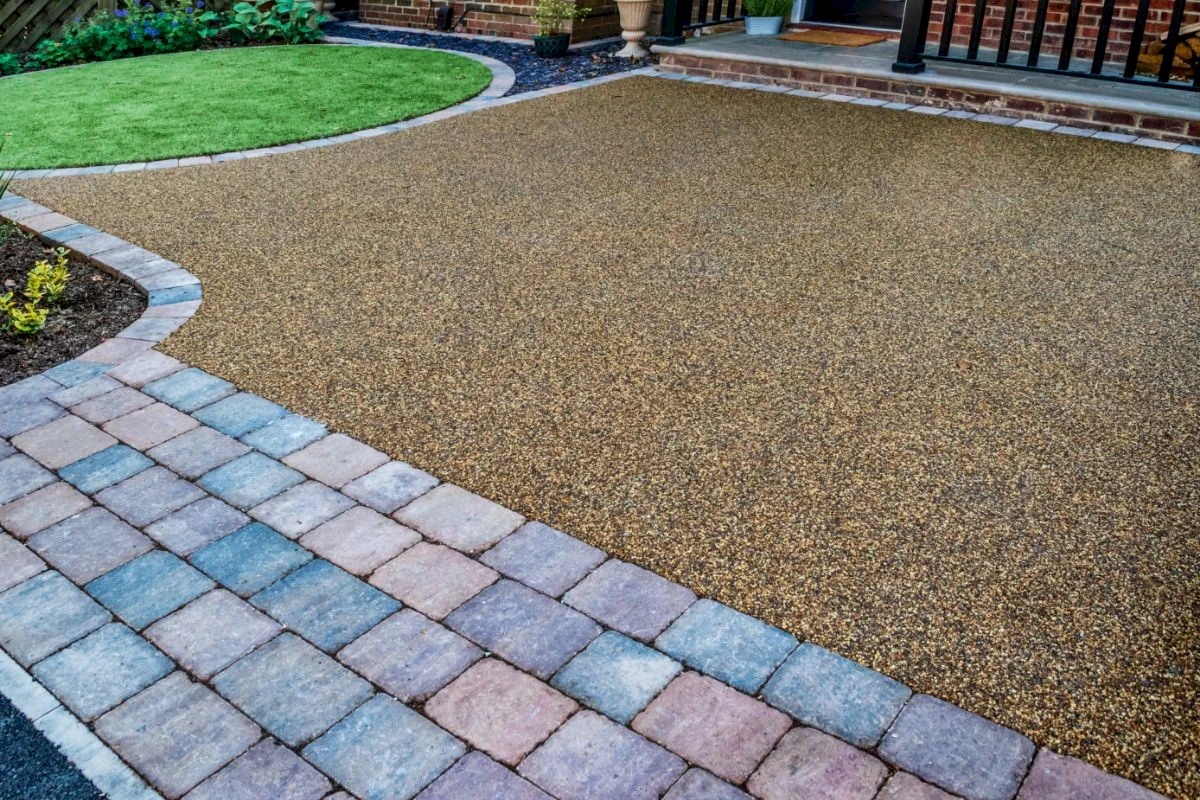
A resin driveway is made by combining aggregate stones with a clear or colored resin to form a smooth, hard surface. This combination creates a porous, durable, and weather-resistant driveway. Resin driveways are favored for their seamless appearance, reduced weed growth, and excellent drainage capabilities. They can be customized with various colors, patterns, and textures, allowing homeowners to match the driveway to their landscape or property design.
Resin driveways are suitable for both residential and commercial properties. They are ideal for high-traffic areas due to their strength and ability to withstand different weather conditions. However, proper installation is crucial to prevent issues such as pooling water, cracking, or uneven surfaces.
Materials and Tools Needed
Before starting, gather all the necessary materials and tools to ensure a smooth installation process.
Materials:
- Resin binder (clear or colored)
- Aggregates (natural or colored stones)
- Primer (if required for your base)
- Weed membrane
- Edging materials (metal, timber, or stone)
- Jointing resin (for pattern work)
Tools:
- Shovel and rake
- Wheelbarrow
- Plate compactor
- Trowels or squeegees
- Resin mixer or drill with mixing attachment
- Protective gloves, goggles, and mask
- Measuring tools (spirit level, tape measure)
Having the right materials and tools on hand will save time and prevent mistakes during the installation process.
Step 1: Preparing the Area
Proper preparation of the site is the most critical step in installing a resin driveway. Start by removing the existing driveway, turf, or debris from the area. Excavate the site to a depth that accommodates your sub-base, typically 100–150 mm, depending on the traffic load.
Once excavated, ensure the ground is level and free from loose soil. Lay a weed membrane to prevent vegetation from growing through the driveway. Then, install edge restraints to hold the resin and aggregate in place. Edging can be made from timber, metal, or stone, depending on your preference. Proper preparation ensures the driveway will remain stable and durable over time.
Step 2: Installing the Sub-Base
A strong sub-base is essential for supporting the resin surface and preventing cracking or sinking. The sub-base typically consists of crushed stone, MOT Type 1, or other well-compacted materials. Spread the sub-base evenly across the excavated area and compact it using a plate compactor.
For driveways that will bear heavy vehicles, a thicker sub-base is recommended. Check that the surface is level using a spirit level and adjust as necessary. The quality of the sub-base directly impacts the longevity and appearance of your resin driveway.
Step 3: Applying the Binder Layer
The binder layer acts as a foundation for the resin and aggregate. Some installations may require a primer to help the resin adhere to the sub-base. Follow the manufacturer’s instructions regarding primer application if needed.
Next, mix the resin binder thoroughly according to the manufacturer’s instructions. Gradually combine the resin with the chosen aggregate stones in a wheelbarrow or mixing tray. Ensure the mixture is even to avoid clumps or inconsistent coverage.
Spread the mixture evenly across the sub-base using a trowel or squeegee. Work in small sections to prevent the resin from curing before spreading. The binder layer should be compact and level to create a smooth, uniform surface.
Step 4: Adding the Resin Top Layer
Once the base layer is in place, it’s time to add the top layer. This layer typically consists of smaller decorative aggregates mixed with clear resin. The top layer provides the smooth, polished finish characteristic of resin driveways.
Mix the top layer resin and aggregates carefully, ensuring complete coverage. Pour the mixture over the prepared base layer and spread it evenly using a trowel or squeegee. Check for consistency in thickness and make adjustments as needed. Take care to maintain a uniform surface and avoid any uneven patches.
Step 5: Compacting and Finishing
After spreading the top layer, lightly compact the surface using a roller or trowel to remove air pockets and ensure proper adhesion. Work carefully to avoid disturbing the design or pattern of the driveway.
If desired, decorative patterns or borders can be added during this stage using jointing resin or contrasting aggregates. Smooth the surface as needed and allow the resin to cure according to the manufacturer’s instructions. Proper curing is essential to achieve a hard, durable finish that can withstand foot and vehicle traffic.
Step 6: Curing and Maintenance
Resin driveways typically take 24–48 hours to cure sufficiently for light foot traffic, with full curing taking up to a week. During this period, avoid walking or driving on the surface to prevent impressions or uneven areas.
Once cured, resin driveways require minimal maintenance. Regular cleaning with a broom or pressure washer is sufficient to keep the surface looking fresh. Inspect the driveway periodically for minor damage or staining, and repair promptly using resin patch kits if necessary. Avoid using harsh chemicals that can damage the resin or compromise the surface finish.
Tips for a Successful Resin Driveway Installation
- Choose high-quality resin and aggregates to ensure durability and aesthetic appeal.
- Work in small sections to prevent the resin from curing before spreading.
- Ensure proper drainage by slightly sloping the driveway away from buildings.
- Always wear protective gear, including gloves and a mask, to handle resin safely.
- Follow manufacturer instructions precisely for mixing and curing times.
Benefits of a Resin Driveway
Resin driveways offer several advantages over traditional driveways:
- Durability: Resistant to cracking, weather, and heavy traffic.
- Low Maintenance: Easy to clean and maintain, with minimal repairs needed.
- Aesthetic Appeal: Available in various colors, textures, and patterns.
- Eco-Friendly: Permeable surfaces allow water drainage, reducing runoff.
- Value Addition: Enhances property curb appeal and overall value.
By following the steps outlined above, homeowners can install a resin driveway that is not only functional but visually appealing. Proper preparation, high-quality materials, and careful attention to detail will ensure that the driveway remains a long-lasting and attractive feature of the property.
Conclusion
Installing a resin driveway can transform the look of a home while providing a durable and low-maintenance surface. By carefully preparing the site, installing a solid sub-base, and applying the resin and aggregate layers correctly, anyone can achieve a professional finish. Resin driveways offer a perfect balance of beauty and practicality, making them an excellent investment for homeowners seeking both style and functionality. With this step-by-step guide, installing a resin driveway becomes an achievable project that delivers lasting results.